Search This Blog

Saturday, January 29, 2011

Moving slow again today

Golly moving slow is not my nature but if ya back is out thas what ya do. The back is some better today although not much. Must be a nerve in a pinch because it has affected my legs a good bit. They just don't work like they should so I don't try to maneuver uneven surfaces too much. But suppose it will grow back. I did get a call from the nursing home this morning and mom came back from the emergency room on antibiotics and pain meds till she sees the surgeon next week. So she is feeling some better.
I finally got the rest of my cornmeal bagged up and vacuum sealed and put in storage. Then mixed the salt cure for Rodger to take with him hog hunting next week. Now if I can get laundry done and folded the house cleaning will just have to wait till the back works again.
We went and checked on the pork that we are curing from the hog we butchered about 4 weeks ago and it seems to so far be doing OK. It got a good bit colder after we butchered than I would have liked, but we just don't control the weather. The bacon was dry enough that I felt comfortable going ahead and hanging it up. So we did. The hams need a lil more time to lay on the bench to cure a while as they are not as dry as they could be.

Cured meat needs to be dry before hanging as to not have the cure mixture fall off it. See the bacon is dry but the hams are not.

The hams are still curing so they are left till they are dry then they get hung up as well. These will be kept separate on this bench from the wild hog meat that Rodger brings home from his hunt. I just never like putting cured meat in direct contact with meat that is just starting to cure. The hams here are drying nicely and don't need moisture on them from fresh ones that are just starting to cure and produce a lot of moisture. It normally takes 3 to 6 weeks depending on the weather. It is best to do the curing when the temps are cold but stay above freezing both day and night. It seems to take less time to draw the moisture out. But they are progressing so I wont complain. OK off to do laundry and get Rodger packed up. So till next time, blessings from the McGuire homestead.

Stella

Spring fever has hit

I do reckon I have been bit by the spring fever bug here in the middle of winter. I have had nothing better to do than sit around plottin an plannin the garden for this coming summer. And today sitting is about all I can do. Don't know how or why my back picked this day to go out. But when I rolled out of bed this morning I could hardly walk. Kinda like a knife sticking between the vertebra in my lower back.  Have had issues with my legs all day, not walking really well at all. Dang I'm too young for this crap.Have done all kinds of things to make it feel better to no avail. Pain will make your body so tired and after supper I tried to stretch out an take a nap. The nap was a success but with no relief in the pain. Anyway finally had to get a shower because I was expecting to have to go to the hospital tonight. The nursing home had called to say mom was sick and they did some test and most likely she has gall stones. She did go to the emergency room and returned to the nursing home tonight and I didn't need to go out. So hopefully the meds will make her feel better till she can see the surgeon next week. We shall see.
But I have been reading up on seed saving for some garden plants that I don't have any experience in saving and have actually learned a lot. Found a blog that contained several links that I think you all might get some benefit from as well. So I will share those with ya.  The first link will give ya an idea about how long you can store different seeds and them still be viable. The second one gives ya some ideas on best methods to store all seeds. I like these 2 pieces of info cause ya don't have to read a book in search of the simple facts on how-to. The blog that I was reading has tons of cool links on different things as well. Just some really good info and I know lots of people area seeking out information like this while we are all in the house with cabin fever. So this is kinda what my day has consisted of. I did get to chat on the phone with an online acquaintance today for a bit, well prolly 3 hours, and I so enjoyed talking to Sheri. A bunch of us from a forum that we all frequent are trying to plan a get together this fall after the gardens are kinda done. I am so looking forward to this. Then got to catch up with my friend Deb in Mississippi on the phone as well. Another great lady I met online and finally got to meet in person all to find we have oodles of things in common. So it has been a good day even with my back trying to make me miserable.
Tomorrow will be a whole nuther day and I have several thing I must get done. Got to get salt cure mixed for Rodger to take on his hunting trip so when he gets a wild hog it meat can be set to cure while it is still fresh. Then he will just bring the trimmings home to be made into sausage. I still have the remainder of my cornmeal to get bagged up and stored as well. I sure couldn't carry it back to the summer kitchen to do that today. Lucky to get my legs to carry just me to necessary places like the dinner table or bathroom. Yep some of my friends will agree, I am a mess.
So till next time, blessings from the McGuire homestead.

Stella

Thursday, January 27, 2011

Some gardening changes...........maybe

I have been thinking alot lately about gardening and how and when to plant things. A friend and fellow blogger and some others were discussing onions last year when I thought mine were not going to be any good. He suggested that I try growing my onions from seed. So I ordered the seed. Should have prolly started them last fall but that didn't happen. So they will need to be started now. That is my plan for tomorrow. Maybe we wont have some form of precipitation to deal with an I can get to my potting mix and fill some flats and start the onions. My buddy did share some growing tid ibts with me tho about onions. They need warm 60 degrees to sprout and then will grow fine at cooler temps. He also suggest clipping the tops off the onions as they grow to help then make better roots and stronger stems. Then allow them to get some growth before setting in the garden. This I think I  can do. This will be my first time growing onions from seed as we usually try to find sets here early in the season. But I do hope this will provide us a better quality onion that keeps better in the cellar. Also in growing onions in the past from sets I have learned that onions do not need a lot of soil over the bulb. I have much better luck if I make a ridge in the row where I intend to plant them and set the sets on the lil ridge. As the bulbs grow they will push the dirt away and grow bigger. It also makes them easier to harvest, less bruising and breaking the stems off getting them out of more compacted soil.
There are several different kinds of seeds that need to be started really early like celery, cabbage, and broccoli. I was thinking again today about how we started plants when I was growing up here. At the time we raised tobacco and always burned the tobacco bed off. Build a large pile of scrap wood and limbs on the area for the bed and lit it on fire. This heats the ground and kills any weed seeds that are in the ground. The fire would die down and then we would rake the ashes off. We would build a frame with boards around the area the size to accommodate the canvas that went over the top. The bed was then seeded and in one end dad alas sowed the tomato, cabbage and what ever else we had that needed to be started. The bed was watered and taken care of till time to set tobacco and the tomatoes an stuff were big enough to transplant. They were then pulled from the bed an the roots wrapped in wet news paper and taken straight to the garden and set out. Now if this method worked well back then, why the hell am I starting plants in flats in the greenhouse. The one reason we stopped doing bed was the fact that the canvas material was no longer available when farmers went to starting tobacco plants in float trays by hydroponics. I think this year I might try starting the tomatoes and some cabbage in a bed like we used to. Pretty sure I can find some old sheer curtains to use as a  cover over the seedlings.
When you grow several varieties of a specific vegetable and you don't want them crossed so you can save your seeds you can plant at least 3 of each variety in a large flower pot and place in a separate area. Or better yet as I have done in the past, plant them in your flower beds. This way when I save seeds for different varieties of tomatoes I know the seed are not crossed because there is a good distance between them. When we plant our sweet corn we plant in blocks, several short rows in the same area instead of may 2 long rows the length of the garden. This will improve pollination of the corn and when I save some ears for seed I save the ones farthest from the other variety. I usually end up with a block of one kind on one end and another kind on the other end of the garden. In planting melons, the old was to dig out a hole about 2 ft across and fill it with manure and cover it with soil, flatten the top of the hill, plant about 4 seeds in each hill. We always had melons. Somewhere along the way we got lazy and started planting them in rows and they seem to get choked out by weeds. It does make bigger better melons if you fruit prune them when they start to set lil melons. Take all but about 2 off each vine and pinch off the tip end of the vine so it puts more energy into the 2 melons to make them big instead of several lil melons that are not as flavorful. So yep I think we might go backward in time a lil this year when we plant and do some things the old way and see if we don't have better results. Maybe spring will get here soon an I can put some of these things into action instead of sitting around do in all this thinking. So till next time, blessings from the McGuire homestead.

Stella

Tuesday, January 25, 2011

They are messin with our stuff again

Leave it to some goober in gooberment to get the big idea that we lil peons don't need clean dishes anymore. Or that if we use the good stuff to get our dishes clean we don't have enough sense to dispose of the gray water correctly and it might make more algae grow in some stream somewhere. Goodness, ya would think they had better things to do. But apparently not. This is an article on how the makers of our cleaning products are now taking out the ingredient that makes them work. BUT restaurants can still get the good stuff. Yeah well they want to remove the sodium triphosphate from my dish soap or automatic dish tabs, so be it, I will just go to the near by hardware store and get a big ole box of TSP and add a teaspoon to the dishwasher and be done with it. I have started noticing that my Dawn even does not work like it used to. Not sure how many of you make your own soap and laundry detergent and such but I have in the past. Laundry detergent is really easy to make but combining products you can get really cheap.
For homemade laundry detergent you will need Fels naptha soap, ivory or Zote.Also you will need a box of washing soda, not baking soda. Washing soda is sodium carbonate and baking soda is sodium bicarbonate. So make sure it is sodium carbonate, washing soda. You can find it in most large stores in the laundry isle. You can also find the borax there. The recipe is as follows:

1/3 bar fels naphtha, grated fine
1/2 cup washing soda
1/2 cup borax

Grate soap into a large kettle and add about 2quarts of water. On low heat stir till soap is dissolved well. I do this with a whisk. Add the washing soda and borax to the water and remove from the heat and stir really well till dissolved. When it is dissolved good add about another quart of water to the soap an stir well. Transfer the soap to a bucket that is capable of holding 3 gallon or so.  When you have the soap in your bucket stir in another 5 quarts of water and mix well. Let stand 24 hours before use. It will thicken a good bit. Once it sits for the 24 hours you can stir it again and pour into a jug to use. You will only need about a scant half cup for a normal size load of clothes.It can also be used as a pretreatment. When I make my own I add the detergent to the washer as the water runs in and about a teaspoon of TSP(tri- sodium phosphate) for heavy soiled work clothes. Normal light cleaning I skip the TSP. I can make 2 gallon of laundry soap for less than $3. AND I can add the quality ingredients that make it work. This detergent does not have a scent and it does not suds.  When the kids were small I made my own lye soap and used it for everything cleaning. Grate the lye soap fine and run in the blender with a small amount of water to make a thick liquid. I used it for dishes, laundry, mixed it in more water to mop floors.A rag dipped in lye soap water and wrung out will get nicotine off anything including windows. Yes windows! Wipe dry with paper towels.
Now to dig in my recipe idiot book and find my lye soap recipe and make me some soon. Till next time, blessings from the McGuire homestead.

Stella

Sunday, January 23, 2011

Seed storage and what we plant

I got to wishing for spring today I guess and got out my garden seeds to see what all we had to plant this year. Lots of the staples we saved seed from last year and have plenty. Some I have had to buy this year. I think I have so far eliminated all but about 2 or 3 that are hybrids, the most are heirloom varieties. I didnt realize how many things we plant every year till I got them all out and on the table.

I did sort out all the seeds for things that need to be started in the greenhouse and have them in one place for ease of locating when I get ready to start them. The rest are direct seeded in the garden at the appropriate times. Here is a list of what we plant most every year.

Sweet corn- Stowells evergreen (white), golden bantam (yellow)
Beans- Ky wonder bush, tobacco worm
Beets- Cylindra, Detroit Dark Red
Peas-Sugar snap
Cucumbers- National pickling, Mexican sour gherkins
Eggplant-Black Beauty
Leeks-Giant Musselburgh
Cabbage- Late Flat Dutch, Red Express
Okra- Burmese
Carrots- Danvers half long
Onion- Stuttgarter
Popcorn- Japanese white hulless
Celery
Lettuce- mixed varieties
Peppers- California bell, jalapeno, cayenne, hot an sweet banana
Squash-winter an summer varieties, cushaws, pumpkins
Tomatoes- Amish paste, Abe Lincoln, Rutgers
Broccoli
Melons- watermelon, cantalope (football shaped)
Cow Peas-Pink Eye Purple Hull
Mustard- for greens
Turnips- for greens
Rutabagas

Some of the things we plant are for our use and some are grown as extra to feed stock. The cushaws, pumpkins, and squash are for us to use and for feed for the hogs. We also raise the Boone county white field corn for cornmeal and to feed stock. Sunflowers are another thing that is used for us an stock feed, mostly the chickens. This year I do plan to raise more sunflowers to harvest the seeds for the chickens in winter. I still may order some mangel beet seed to plant to feed to the hogs as well. They also get turnips, excess rutabagas  an the garden waste once each veggie is done producing. Then just the corn for about 6 weeks prior to butchering.

I think this is the list, but we also plant a lot of herbs as well as strawberries. We have asparagus, blackberries (wild and tame), and several fruits.
The list of herbs is quite long as well.

Lavendar
Parsley
Sage-broad leaf
Stevia
Caraway
Common chives, and garlic chives
Borage
Savory
Marjoram
Basil- large leaf
Chamomile
Pyrethrum
Spearmint
Lemon mint
Peppermint
Bergamont
Horseradish
Dill- Long Island Mammoth
Oregano
Tarragon
Thyme
Also stinging nettle and comfrey.

Some of the above herbs are kinda new and jus now have the seed for them. The stevia, borage and caraway are new an will be started this year. I sure do need to expand my herb bed a good deal.  Most of the herbs are perienial though and will self seed or some just come back the next year.
I have given some thought to maybe making a bed somewhere out of the way to plant a few plants of some of the veggies that take 2 years to make seed. Seems this would be the safest way to make sure they are left to grow and grow the second year. In the garden it all gets plowed under in late fall to get ready for the next spring planting.
I have always kept my garden seeds stored either in the refrigerator or freezer all my life. I have the crisper pans in the second fridge dedicated to just this purpose. It makes them handy to keep track of and when I am lookin thru seed catalogs I dont have to go dig thru the big freezer to find the seeds to see if I have certain ones.

This makes a pretty good storage method I do think Well at least for me. Cause we all know how bad I am for losin things.
Till next time, blessings from the McGuire homestead.

stella

Saturday, January 22, 2011

Storing homegrown foods

 First of all, my joints do feel better, none of the soreness that I had been having. So I do feel much better. Now if my body could get adjusted to this dreaded prednisone so I would not be eating everything in sight I would be good to go. But its only temporary. But at least I do feel more like getting things done for now. But I sure don't spend much time outside with temps in the 20's for highs in the day. My bones still don't like that. And probably wont like the snow we are posed to get all next week.
 Yeah I know, too much time on my hands. And yeah I been thinkin again. Don't ya love it when I have been thinkin. Well as ya know last weekend we got our corn meal ground and when Rodger got home we put it still in the bags into the freezers to kill any insect eggs that might be in there prior to storage. So was thinking it has been in there for a week so they should all be dead lil nasties and I decided to get busy sifting the meal. I normally do not sift our homegrown meal, but this year when the gentleman was grinding it he had ask Rodger if it was fine enough an he said yes. Well it wasn't fine enough an had far too many larger particles in it so it all had to be sifted. Talk about a slow go. I got 2 bags done today and brought it in the house where it is warm and dry to let the moisture equalize in it and come to room temp so I can vacuum seal it for LTS. I sifted out about a gallon an a half of milling's from 2 of the 3 bags. I still have 1 more bag to sift an get ready to bag up. Storing grains of any kind is easy and it keeps really well if you take a few precautions. Either freeze the grain for a couple weeks before grinding or freeze the flour or meal  after grinding to kill insect eggs that may have been laid in the grain while it was still in the fields. This method pretty much will guarantee no insects in your meal or flour. Unless it is left open and they get in later. After my corn meal comes to room temp and is vacuum sealed in bags it is then stored in a 35 gallon barrel with a air tight seal in the cellar. I use this method for all grains and products like this. I have 2 of those barrels in the cellar for storing goods that are sealed in bags. One barrel has sugar, salt, powdered milk and such in it, the other has grain an grain products. With the price of sugar on the rise I am thinkin I might see about getting another 50 to 100 lb to store., Sugar will keep for a long time and doesn't go rancid. The worse thing that can happen to sugar is to get moisture in it an get lumpy which is no biggie. May also be a good idea to get a bit more flour to store as well with all the wheat crop lose that is being talked about on the news. I don't think anyone can store enough to do them a life time at the price it is now, but when the price has went up drastically the flour an such that you buy now will be like buying it at a really good sale price later thus saving a good deal of money. We also buy macaroni in bulk at Sam's club if we need it, I don't use much but sure do like mac an tomatoes sometimes. The macaroni is also vacuum sealed in smaller bags an into the barrel it goes for LTS. That makes me think, growing up mom alas made macaroni an tomatoes or tomato juice and for the life of me I don't know how she arrived at the taste. It has take me years to fine tune this dish to taste like what I remember from childhood but I finely did. So I will share it with you if you remember macaroni an maters growing up.

First off there is really no measurements, its really just a method. Heat your water to boiling an add some salt and a good generous splash of oil or in my case a spoon full of bacon grease. Add the macaroni an let it cook till its still firm, not quite al dente. Drain off all but about a half inch of the water and pour in tomato juice or home canned tomatoes with juice to cover the macaroni and cook till tender. If you have about a quart of cooked macaroni add 1 to 1 /12 teaspoons of sugar, yeah sugar, to the macaroni and season to taste with salt. Stir well an serve. The sugar cuts the acid taste of the tomato and just makes em so good. Enjoy!
Till next time, blessings from the McGuire homestead.

Stella

Wednesday, January 19, 2011

I think I have it figured out

Well at least I think I have a hint as to why all my joints hurt now. As ya know I saw the "arthritis" doc on Monday. He ordered a bunch of labs and x-rays of both hands. So I went on Tuesday to my family doc an had those done after verifying that my insurance would pay for the test he ordered. Some of the test were to try to find the source of the inflammation in my joints. After some research on my own I am thinking it is diet related. And it does point in the direction of the few things that we have been using from the store. So as I think back to about a year ago when I had my physical the labs at that time indicated that my cholesterol was slightly elevated, indicating too much of the wrong fats. So if you consume too much fat that contains omega 6 and not enough omega 3 then you get an over abundance of inflammatory cells, which I am sure I have to cause the sore stiff hurty joints. A few years ago, per family's wishes we stopped using lard as a primary cookin material and started using peanut oil, olive oil and butter. ALL of which when processed in some big factory are heated before they are "safe" for sale. This heat process alters the omega 3 an makes it useless in the body an lets too much of the omega 6 run wild to produce the inflammatory response to the extreme. There must be a balance of 3's to keep the 6's under control so when your body needs the inflammatory response it is there but enough of the omega 3 to produce the control. Kinda like the 6 being employees an 3 being the bosses, not enough bosses around the the employees gang up an cause problems. But any who the labs the doc ordered will confirm this or prove me bad wrong. And in the meantime doc wanted me to take prednisone for 2 weeks to see what the results would be and it would further aid in his diagnosis. I picked up the meds yesterday at the drug store and took the first dose last evening after supper. With just one low dose I could not believe the difference in how I felt when I got out of bed this morning. Not enough soreness an stiffness to hardly notice. I could move better without hurting so bad and my joints were not swollen an sore. So I have had a pretty good day. Got up earlier than normal too and don't feel so tired even after cleanin up the house and starting supper. Who would have thought that inflammation could do so many things to the body.
So now am off o research foods that will increase my intake of the good fatty acids to try an get this all balanced an in check. Not to mention the fact that prednisone makes me hungry ala time so I may look like a marshmallow in a couple weeks with this.
Till next time, blessings from the McGuire homestead.

Stella

Monday, January 17, 2011

A long day in traffic

Dang don't ya just love city traffic? I had a doc appointment out of town today and we headed out to that about an hour away. I think every jerk an their brother was out today. Well probably because the weather has been bad and everyone is trying to catch up on appointments and all. Not to mention the big grocery stores. But the docs visit went OK, I have to have some labs drawn AFTER I figure out if my insurance will pay for them as they will cost close to $1000 if not. The doc wants to be for certain what type of arthritis I have. I did learn that there are about 100 different kinds of arthritis too. And the an x-ray of the hands an wrist can tell the doc a lot as well. So yep gotta have some x-rays done too. After that we headed off to Sam's club to pick up a few things for us an a lot of things for the company. I noticed that 25# of sugar has gone up by $4 since I bought some in November. Coffee is still the same price as it was in August when we were at Sam's. So I guess some good, some bad. I did stock up on flour, coffee, another bag of sugar, and a few other basics that elude me right now. At least in our travels the weather was decent, although it did rain a lil on us most of the day. I think it is supposed to do that for several days this week. We do still have some icy spots on our road, nothing major tho. So hopefully we will have a few snow free days. Till next time, blessings from the McGuire homestead.

Stella

Saturday, January 15, 2011

The cornmeal is done

The fellow that has the gristmill that grinds our corn for cornmeal was up and running today. So Rodger had an appointment to be there at noon to get ours ground. It was close to 2 bushels of corn and he brought home 3 nice big pillow cases full of cornmeal. I set them in the freezer for the freeze cycle to kill any bug eggs that might hatch out. Will probably let them stay in there a couple weeks the then bag it up and vacuum seal it and store it. My good friend Rosie doesn't know yet but she will be getting a whole bunch of fresh corn meal when I visit her in spring, or just a couple months. But now we are finally done with all the fall chores here, and its January. I tole ya we got behind for some reason.
Not much happening around here right now, just planning the next seasons garden and making plans on where to build a pen for a couple pigs to raise for meat next fall. I do know the garden will be good size as usual, thas a given, still not sure about the pigs yet and where they are gonna live. Another project that will take place in really early spring is getting the chicken pen put up so the laying hens can run out in day time. With Rob moving last fall and we stayed busy all season it just was low on the list of to-do things. I had given some thought to maybe building the pen for the pigs near the chicken lot for ease of feeding. May have to take a closer look at that possibility.
Till next time, blessings from the McGuire homestead.

Stella

Friday, January 14, 2011

Some tidbits of info

I have been doing some comparison of garden seeds and the quality of veggies they each produce and will post it here so some others may be able to decide if its the variety that they are interested in.

1. tobacco worm beans- in zone 6 planted them mid June and still got a good crop even with the dry weather. The beans fill out well and the pods are still tender, not leathery. When cooked they have a sweetness to them, no sugar added. They also climb really well and are heavy producers.
2.Golden Bantam yellow sweet corn- an open pollinated variety, germinates great in cool ground for an early crop. Large well formed ears that are very sweet.Sturdy stalks that most produce 2 good ears of corn. Grows to about 6 ft.
3.Stowells Evergreen white sweet corn- an open pollinated variety, needs warm ground to germinate, does better planted after the ground warms, sturdy stalks with 2 ears each, long ears that stay tender longer, very sweet. Most of the stalks grow to 7 ft or so.
4. Carrots, Danver half long- easy to grow, germinates well in cool ground, can be started really early in zone 6, Does exceptionally well in hard ground. It will go down deep and produce a large carrot that is still very tender and sweet, not woody when they are bigger.
5.Beets, Detroit Dark Red- excellent all around good beet, grows well in cool weather and dry conditions. Gets really large when there is sufficient rain fall and does not get stringy and fibrous. Sweet and easy to cook.
6 Sugar Snap Peas- an heirloom , very good peas, tender even when they get full, very sweet, easy to grow, does great in cooler weather.Does not thrive in hot weather at all. Very easy to string, but do have strings.
7.Kentucky Wonder Bush bean- An heirloom bush variety that produces really well but is slow to start producing. Makes you think they are not going to produce then they set on and really put out. Brown bean inside a very tender pod, stringless, tend to grow in small clusters of 3 or 4 beans. Great for green beans or dried in the pod for soup beans.
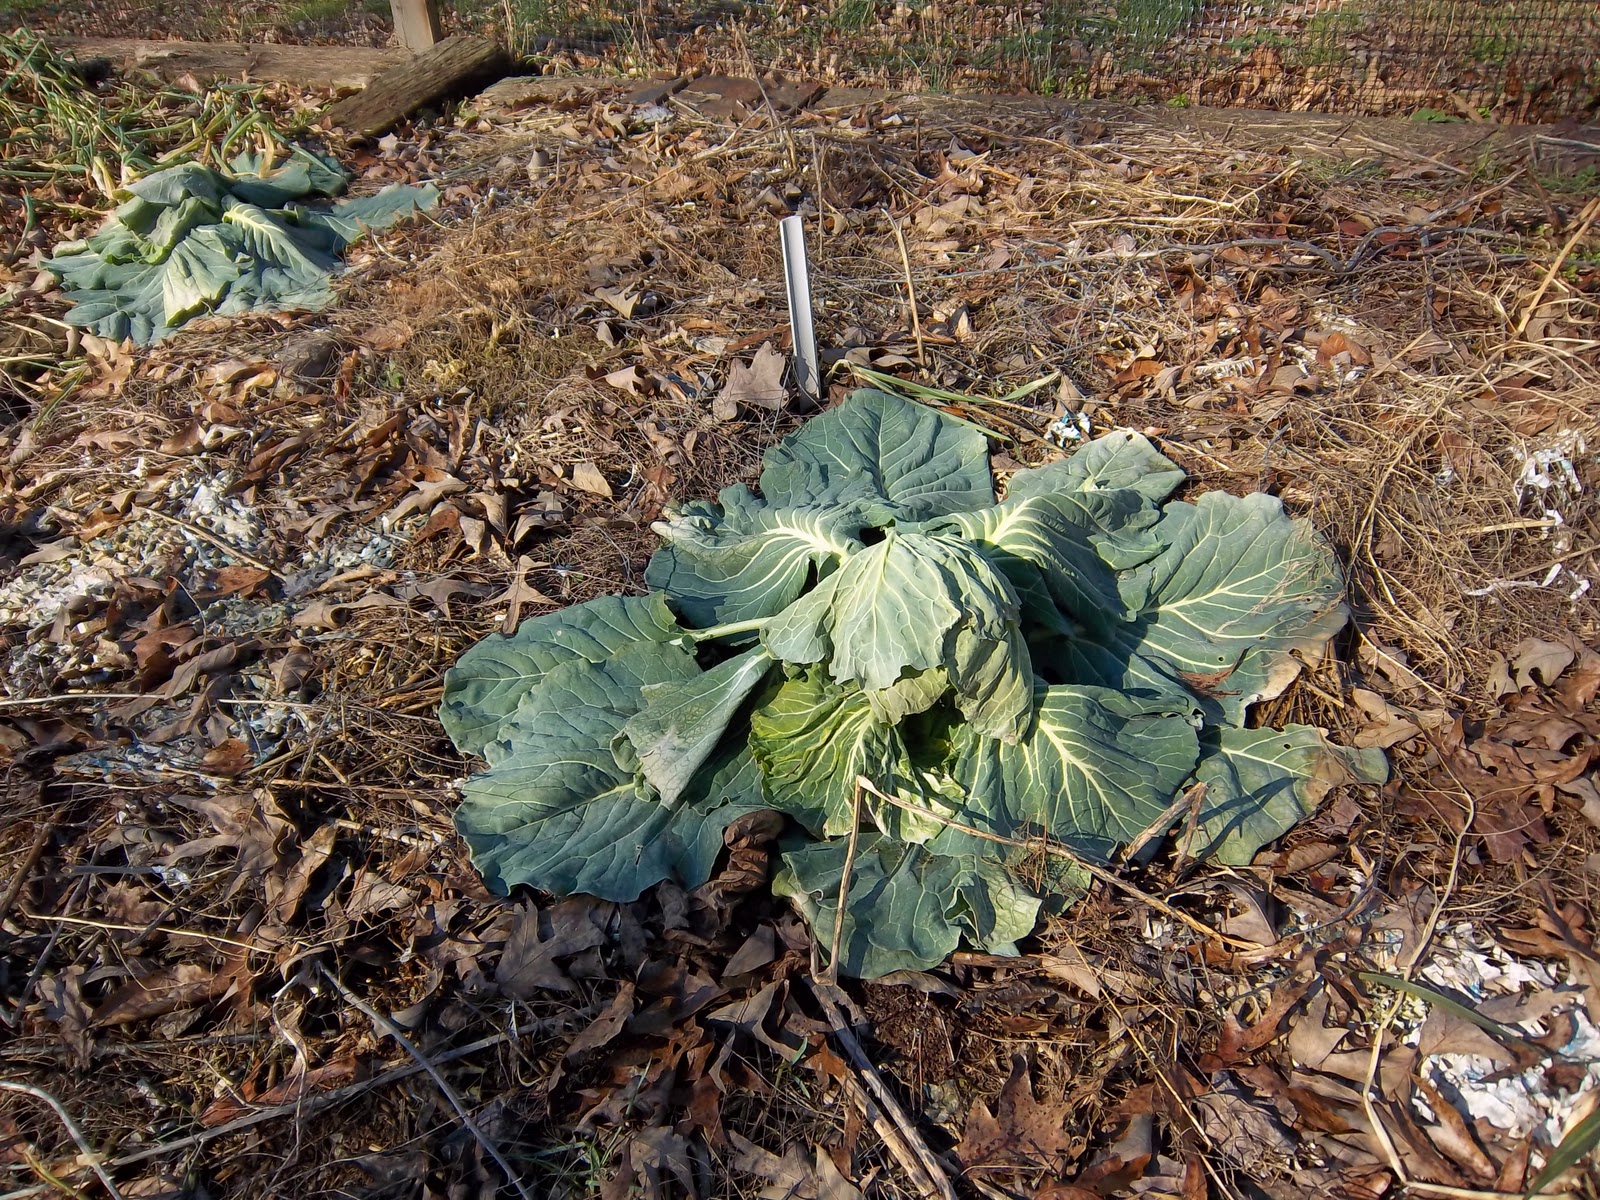
8 Cabbage- late flat dutch- large head, very solid, sweet if grown in cooler weather. A somewhat longer season variety, stores really well in cellar.
9. Cabbage, Mammoth red - these cabbage grow well in any condition, worms don't seem to bother them as much as green cabbage, very very solid head, leaves are really tight together, excellent for making kraut as they don't fall apart as they are run thru the cabbage cutter. Stays red when cooked as well.
10. Amish Paste Tomato- heirloom variety, prolific producer, good size elongated shape as well. very small seed pockets, perfect for juice and sauce. Sweet without the strong acid taste.
11.Abe Lincoln tomato- heirloom variety, good all purpose tomato, good to can, sauce, juice or just to slice for a sandwich. Produces in clusters on the vine, very heavy producer as well. Round smooth tomato with small seed pockets
12 Rutger tomato- heirloom variety, excellent all purpose tomato, will produce under extreme conditions, does well to be left to trail on the ground.  Round smooth tomato with good deal of liquid around seed pockets.

This is just a list of most of the basics that we grow. And also what does best for us in our zone. Hope this helps someone a lil bit in their gardening.
Till next time, blessings from the McGuire homestead.

Stella

Thursday, January 13, 2011

There is still a world out there

I got the chance today to find out for sure if there is still and world outside the boundaries of my farm. Well there is. OK laugh if ya want, I am a home body. Haven't been off the place since Christmas eve. I had a doctors appointment today so I had to get out. Hubby drove me to doc appointment cause I have all but quit driving on slick roads. And ours is still treacherous. But no wonder, it has snowed since December 1. I am really getting to the point that I hate to go out anymore. No specific reason, just nothing out there to lure me. First off, I am not your typical female shopper. If I have to go out shopping for something, I know where I need to go to get it and thas what I do. I don't go out for entertainment cause I just don't feel the need to be entertained.  I guess I am content in my little world to be left alone. Or maybe I'm just getting old. I bet thas what my boys would say. Really though I did make a couple stops for a few things on the way home. Of course the drugstore, then the local dollar store to get a bottle of Windex, yeah 1 bottle will last me a year. Ya should have guessed that, you know already I don't do windows. The dollar store also had coffee and we are out I think, didn't look real good in the cellar, but dang it the price has went up. $8.75 for the size can I had been getting for $5. What the heck, is somebody trying to start a war here? Don't mess with my coffee unless ya want trouble. Then a quick stop to the grocery store. When the hell did instant pistachio pudding stop being 25 cents a box? It was on "sale" 3 small boxes for $2. But I really don't need pistachio pudding, I need a diet. But I got some, I have my weaknesses to and thas one of em. So I got traumatized once again with sticker shock and we came on home. Just glancing around at some of the items that were on the end caps at the store on "sale" made me feel really bad for folks who shop for all their food needs. It was an eye opener that made me much more thankful for being able to raise my own. AND for being able to stay at home all the time.
Till next time, blessings from the McGuire homestead.

Stella

Tuesday, January 11, 2011

Just wondering

I have been wondering today about our immediate weather and how it will effect our weather for the summer growing season. In years past when we have had a bad snowy winter we usually have a hot dry summer. If this holds true it might make for some slim gardens this year. We have our garden spot in the river bottom, out of flood danger, and that does seem to help with gardening in dry seasons. We get the early morning fog that does bring in a lit moisture to the ground and with it being on the river there is moisture deep down in the soil. This winter we have had some cold temps but they have been following the snow cover. So with this pattern the ground has not been frozen. This I think does help the ground to absorb the water from the melting snow. But we just keep right on planting and growing every year and take the failures with the successes. So far we have not gone hungry. And with all this snow and cold, and me staying in this winter, I am so looking forward to spring and getting started planting things. I have thought it would be nice to have a permanent greenhouse to try and grow a few things all winter here. That is something I may have to work on this spring. I think it would be nice to pick a fresh tomato in January. One thing for sure ya can not buy good ones from the store and if ya buy one at all be prepared to pay with your first born. But then I think, when I was growing up we at what we had canned in winter and just enjoyed the fresh ones in summer at their peak. Hmmmm, maybe thas what we should do know. The trend seems to be telling us "eat local and eat in season". Hell thas nothing new, I grew up that way. We are not big salad people in our house now and we didn't eat salad when I was growing up but we did and still do have green things in our diet. We have peas, green beans, broccoli and those kinda nutrient packed veggies as opposed to salad with lettuce that has very little in the way of nutrition. Also I don't remember much citrus growing up either but we had sauerkraut which is packed with vitamin C. So all and all I think we ate and still eat pretty healthy as compared to most. We just get our vitamins from a better homegrown source. And I like that way of living. Back to the basics, the simple life.
Till next time, blessings from the McGuire homestead.

Stella

Sunday, January 9, 2011

The older I get the more I understand..........

The older I get the more I understand the things that I learned hanging on my dads shirt tail. The more I learn to appreciate the simply life I had growing up. I guess to some people we seemed poor by modern standards. But who sets those standards any way and why? You are considered very poor if you don't have indoor plumbing and running water. But if you have clean pure water to consume and use for everyday needs, even though it don't come from a municipal water source, you still have water, so how does that make you poor? Just because you grow your own food and it don't come in a fancy package from the grocery store, how does that make you poor? Just because you know how and do, with your own 2 hand procure your own meats and process them, how does that make you poor? As an adult I now know we were rich in the things that really matter.  Growing up I learned all these things and it was a way of life. I never knew I was poor. I had to work hard but I always had a few dollars in my pocket and had what I needed as a child and on into adulthood. We didn't have TV growing up so we never knew of all the bad things that happen all over the world like we do today. I'm not so sure that knowing those things help us at all. Sometimes it just gives us things to stress about that we can in no way control. As parents we keep our kids safe by protecting them from harmful things, essentially things we can control around us. So seems to me if we strive to make our own self and personal surroundings and life good then it has to make a better world. That is "if" everyone did the same. I think there was a song or something that kinda said "wall street fell, we were so poor we didn't know". If you don't see all the bad things out there and just focus on day to day life around you then it does lessen the impact. I think we all need to start with taking care of things in our own personal life, spiritual life, then our home, our local community, help a neighbor, help a friend, ease someone elses burden, one person at a time. Even as our country is in a mess at this time in our lives, I think it is "we the people" that can and will in the end make a difference and not big government. This new year I hope to be able to make me a better person, take care of my home and surroundings, then the farm, then do what I can to help local people and I think we all by jus doing this can make a big difference in our life as well as others. I guess some people might think I am a bit naive or sheltered, but so be it. Yes I do believe God is still in control, and I still believe in the good in other human beings. Call it what you will, but I guess in light of all the things that have been happening on the news this weekend made me stop and think. Even as sad and bad as the shooting in Arizona was there were still many more "good" people there than bad. The people who helped render aid to the victims, the ones who did the right thing and subdued the perpetrator, all those people doing what was "right". With no time to think if their actions would later seem self serving. IF you look at the number of people at just that scene, probably a few hundred, and only one "bad" that was out to harm another individual. Seems to me the "good" still far out number the "bad". We all in our own lil world, no matter how small or large, need to do all we can to make a positive impact on those we come in contact with and always do what is "right". Your conscience will guide you to do so, I believe that. So I challenge you to make a difference in the world, in your world, in your community, reach out to others, be  a leader. Its little things that add up. No I am not running for any political office in the future, sometimes I don't think I have a lot to contribute. But the little things can make a big difference in someone elses life. I have witnessed that happen many times. It may be a simple thank you to a stranger who holds the door for you at the grocery, that might be the only positive thing that has been said to that person that day. When you ask someone how they are doing, take time to listen to their answer, they may jus need a sympathetic ear for a few minutes to make their day. Take time to stop and smell the roses. Cause something tells me you cant smell em from 6 ft under.
Till next time, blessings from the McGuire homestead.

Stella

Saturday, January 8, 2011

Here we go again

I think someone has threatened the weather man in our area to make him lie and say the snow was ending yesterday at noon. He didn't mention this shit.

Yep we woke to about 6 inches of snow this morning. I got up to find the house empty and thinkin it was Friday. Then it occurred to me that it was Saturday and I was home alone. Rodger and Jason had taken off for Lexington this morning. Oh well I had my coffee and did my usual thing. Around noonish the sun popped out and the snow started to melt a lil.
The sun looked warm but that was quite deceiving. I did go out and shovel off the back deck and swept the snow off the front porch. For it to snow all the way across our porch the wind had obviously been blowing pretty good at some point. As it got later and the sun went down it got colder. Other than shoveling the deck and porch I stayed in today. I got the brainy idea to make me a big skillet of crackling corn bread. I love the stuff. And it was jus me here to eat it. I turned out soo very good, nice and brown.

I had to cut a chunk while it was still warm and add more fat to it in the form of butter. Yummy!!!
So I have been snacking on this all day. It makes me a happy camper anyway.
I had turned the TV on today to watch a lil news just in time to see the latest on the shooting of an Arizona congresswoman and the killing of a Federal Judge. So sad to see that there are people out there who are not man or woman enough to use our freedoms wisely. I am hoping this does not give some liberal goober the idea that more gun control is needed. So when I say my prayers tonight I will say a prayer for those victims and their families as I hope you will do also.
Till next time, blessings from the McGuire homestead.

Stella

Friday, January 7, 2011

I think I crashed and burned

My body don't do well with this work really hard after being in hibernation for a few weeks. I did very little and then worked my hinny off with the hog butchering and then yesterday I just stayed in to clean house and do the general house keeping things. By early evening last I laid down to take a nap. Well that dang nap lasted till 4 am this morning. That is never good for me. I really messed up my sleep habits, such as they were, and then today I crashed again. I took about an hour nap and when I got up I was achy all over. Dang it I feel like I'm getting the flu. I suspected something like this several nights ago when I had some stupid dreams. I don't dream unless I am getting sick. This is not how I wanted to spend my hibernation.Yuck! Jus shoot me now.
Anyway I did manage to get my cracklings all browned up and in the freezer and the hominy jars all washed and ready to go to the cellar. We still need to shell a bit more corn for corn meal. Rodger called the guy this evening and he will hopefully be running his grist mill next weekend. Then we can get the corn ground and taken care of. I am a bit late with all this stuff tho. We normally shell the corn, put it in the freezer for a couple weeks to make sure to kill all the bugs eggs in there and then dry it an have it ground. Time is not going to allow that this time. So the corn is dry, we will get it ground into meal then put the meal in the freezer for a couple weeks. After that I can take it out and let it come to room temp and seal in the vacuum sealer for storage. In my opinion all grains need to be done this way to keep them from getting buggy. I have always done my grains like this and so far, knock on wood, have never had a bug problem.
Oh I got to tell ya, I made pepper steak with venison for supper tonight and it was good. Lots of peppers and onions, meat and gravy over rice with garlic bread. Ok here's what I did.

2 lb venison roast or steak cut in 1/2 thick strips about 2 inches long
2 cups sliced onion
2 cups bell peppers, red and green, sliced or rough chopped
2 tablespoons beef bouillon or beef soup base
2 tablespoons of minced garlic ( I add more to taste)
2 tablespoons soy sauce
1 tablespoon Worcestershire sauce
4 tablespoons cornstarch
1 quart water plus about 1 1/2 cups
salt and pepper to taste

I do this in the pressure cooker. Add about 2 tablespoons of butter and a few tablespoons of oil to the bottom of the cooker, heat, add the meat strips and brown. After the meat is brown add the onions, peppers, beef base, Worcestershire sauce,garlic and 1 quart of water. Put on the lid and let this come up to pressure and let it pressure cook for about 2 minutes. Then turn off the heat. Let the pressure off and remove the lid. In a separate bowl mix the remaining water, cornstarch, soy sauce till well blended. Add this to the simmering pot of meat and veggies to thicken. You can adjust the liquid, if you like more gravy add a lil more water to the initial cooking and then season to taste with salt and pepper. When the gravy has thickened serve over rice with lots o garlic bread. Its good stuff.
Just this short cooking time will make the meat  tender as well as the veggies but the veggies don't cook to mush. Enjoy!

Till next time, blessings from the McGuire homestead.

Stella

Wednesday, January 5, 2011

I thought I was done........

I thought I was done with the hog meat and stuff till I remembered the cracklings that I still needed to take care of. So I got them out to the summer kitchen and put them in a cast iron dutch oven to brown a bit more and get out more of the lard. They turned out nice and crunchy. And they taste even better now. Now just needed to let them cool and bag em up and freeze em for later use. While I was out there I got all the jars of hominy washed off and ready to take to the cellar to store. Not much else happening around here now. When Rodger got home he shelled some more corn for cornmeal. We have about 130 lb shelled so far and I think we may try to have about 200 lb total ground for meal. I am so glad we don't have to buy veggies and stuff like that from the store. I read an article online about the freezes in Florida that have damaged the crops down there and I really don't see how the farmers are gonna make ends meet. Not to mention how it will effect the price of what people have to pay in the store. If I had to get what we eat from the store I would panic about now. After reading this  article I know I would panic. Can you imagine $30 for 48 ears of sweet corn? And all the other things that have went up in price after the freeze down there. I am ever so thankful that God has given me the ability to raise most of what we eat and blessed us to put it away.
So till next time, blessings from the McGuire homestead.

Stella

Tuesday, January 4, 2011

Finishing up odd tasks

Yesterday and today were spent just tying up the loose ends after the butchering. I got the lard re-melted and put into hot clean canning jars and it is all sealed up and ready for storage. Easy to do, just get lard melted and really hot and pout into hot jars and put on the 2 piece lids. As the lard cools it will seal and can then be stored in the pantry. It will keep fresh without refrigeration for a year or more. Not sure how long as I havent had a chance to keep it longer.
  The lard is golden colored when it is fresh and still hot but changes to white when cool.
Now off to the cellar with the fresh lard. After I got this all done I started on making my hominy. Jason had about 2 or so gallons of dry shelled corn left from feeding Petunia and it was perfect for what I wanted. It was the same corn we shell for corn meal and is also used for stock feed. The open pollinated Boone County White. So I washed it really good and picked out all the bad grains and red and blue ones. Then let the corn set over night in the kettle with water to cover.


The corn was allowed to soak in the water, no lye, till the next morning. I knew this corn was very dry and hard and I soaked it to hopefully lessen the cooking time. It did help some but still took a few hours.

 The next morning I added about 1/4 cup of Red Devil lye to the cold water in the stainless steel kettle with the corn. You must always use stainless or an enamel cooker for the first step as the lye will eat thru any other metals. Also use wood or stainless steel utensils to stir with as well. Ideally this step should be done outside as to not have all the fumes from the lye in the house but I am in the summer kitchen with good ventilation. But if you do cook the lye/corn inside and have a range hood, as soon as the corn is taken off the burner it is a good time to take a damp cloth and wipe off any greasy residue that has built up. Just a plus to cooking hominy inside. The fumes are strong enough to dissolve the film on your range hood.  Anyway back to the corn, you must have several inches of water above the corn level in order to be able to stir and keep the corn from sticking to the bottom of your cooker. It does need to cook at a gentle boil for a couple hours. You can test to see if it is done by taking a few grains to the sink and running them under water for a minute and then squeeze them,. If the corn can be mashed with your 2 fingers it is done enough to rinse the first time. Check it the first time after about an hour of cooking, then every 15 minutes or so as you dont want it too too soft. After its tender its time to get rid of the lye and clean your drains. I usually put the kettle in the sink and tilt the cooker a lil bit. Turn on the tap and let water run into the kettle till it over flows. The tilting will help you direct the over flow into the sink and not out on another surface. As you notice the water is a golden color when you add lye and are cooking the corn. Keep running water and stirring the corn around till the water is almost clear. At this point it is not likely the lye solution is strong enough to burn the skin but if you want to be absolutely sure you can turn off the tap and stir in about 1 pint of any kind of vinegar. This will neutralize any lye that is left in your corn but with the rinsing there wont be any vinegar taste either. Stir the corn well and if you have run cold water in the kettle it should be cool enough to be able to get your hands in there. Now the fun part. Stick your hands in the corn and gently squeeze hands full of the corn working all around the kettle. The goal is to remove the husk and dislodge the lil dark tips on each grain. But most of the husk part of the corn will have dissolved in the lye solution. The lil dark tips are perfectly fine to leave in there if you want. And trust me I never get all of them out of my hominy as you can see below. The lil tips are actually the heart of the corn and have nutrients too, so no problem, right?
 As you work thru the corn, pick up hands full and rub your hand together with the corn in there like you were trying to warm up the corn. Rinse the corn and put into another cooker. Keep working the corn and rinsing till all the corn is out of the first cooking water. Now cover your cleaned hominy with fresh water and put back on the fire and bring to a boil. From time to time check a grain or 3 by tasting it till it is quite tender, some what soft but not really soft as to go to mush. Remember it has to be processed in the pressure canner for at least an hour after this cooking. You will notice the water may not be totally clear with this cooking. If not drain and rinse and add more fresh water and heat it up again. The hominy should have been through at least 3 changes of water. This is adequate to get out all the lye and vinegar that is in there. Once the corn is pretty tender and the water has cleared its time to put the hominy in jars. I can mine in pints as that is how much I can eat at one time. You can do quarts if your family like hominy. Ladle or drain your corn out of the cooking water and into clean jars leaving about 2 good inches of head space. This allows for any expansion your corn will do in the jar and helps keep it all under water after its processed. Add 1/2 teaspoon of salt to each pint and cover with fresh water. Put the lids on and hand tighten and put them in your prepared pressure canner.  Process at 10 lb pressure 60 minutes for pints and 70 minutes for quarts. Let pressure drop and remove from the canner. For each gallon of dried corn you use you should end up with about 20 pints of hominy. 


I started with about 2 gallon of dried corn and ended up with 41 pints canned and had enough to fix me a good bit for supper tonight. It is good stuff I don't care what anybody says. Now you might say, well it ain't all perty and white like the store bought stuff. Well you are right but see we didn't bleach all the good stuff outta the corn either with other chemicals. Now you can enjoy ya hominy.

I need a dam hobby!!! I do love canning though. The weather was nice and I got some things done that needed doing and it is relaxing for me. While I was letting the hominy cook in the summer kitchen I had to take a picture of my poor lil late cabbages that got snowed on. I had tole my friend Deb on the phone that it looked like they had took a leaf and tried to cover their lil heads. Don't ya agree with me?

But ya know the leaves don't look like they are froze either, even thought it snowed on them. The heads are not hard enough to harvest so I am gonna just leave em alone and see what they do. They would be fine to cut and chop for cooked cabbage but I don't think they would make slaw, or maybe they would. If we had had a normal December they would have make some nice heads before the weather got too bad but with snow starting for us on December 1 they didn't quite make it. But better luck next time.
While I was pressure canning my hominy I thought of my 6 gallon pail in the house that had wine in it. So I toted it to the summer kitchen to strain out the berries and put it back to settle for the second racking.
Talk about smellin good. A total of about 5 gallon of blackberry wine that is back in the tank to settle out. It will get racked a few more times before it is sweetened and bottled and left to age. Now if only I could find my recipe and instructions so far I would post them for ya. As soon as I locate all that I will put up a recipe for the wine.
Gosh it has been a long day for me. Not to mention my babysitter. My girl Luna is always with me where ever I wonder to here on the place. She makes me feel safer as she is always on guard. I think she was posing here.
Till next time, blessings from the McGuire homestead.

Stella

Sunday, January 2, 2011

Method for making souse and pickled pigs feet

I hate that I didn't get to make souse with the hog we just butchered but such is life. I had to laugh a lil when I was looking for the recipe for souse that I made a long time ago. Good thing I had enough sense to write it down. I think it was written in the early 80's and thas probably the last time I made souse meat. My method is kinda Appalachian recipe and way of doing it. So for all who know what good souse meat taste like and want to make it, here's the destructions.

You will need at least one cleaned hogs head. Now this is not something for the faint of heart. It is kinda messy taking the head apart. You will need a good meat saw to do this. Your first cut will be thru the jaw sockets and separate the lower jaw from the rest of the head. You can now trim off any excessively bloody bits and I use a brush to scrub the teeth really well or you can saw them off, your choice. Then the lower jaw can be sawed in half to make smaller pieces. Have ready a large container of heavily salted water to drop the prepared pieces into. Now using the saw cut off and discard about 4 or 5 inches of the snout. This is just tough tissue you most likely wont want in your end product. Then saw the head in half starting midway between the ears and separate into 2 pieces. Remove the brains using a sharp knife. These can be scrambled with eggs for breakfast, I prefer to give em to the dog as a treat. With your knife cut off the ears, they are also just gristle and not very good in souse. Using the point of a sharp knife cut out all the ear canal as far in as you can go. Now take the saw and cut those 2 halves in half again going just under the eyes. Once this cut is made, using your sharp knife remove the eyes and discard. Now you have successfully disassembled a hogs head. If you would like to have the pieces a lil smaller, use the saw to cut them into pieces to fit in what ever container you plan to cook them in. All this now goes into the salted water to sit over night. In the morning rinse the meat really well and believe it or not the meat is a really pretty clean color. Put the rinsed meat into your pressure canner and add about 1/4 cup vinegar and cover with water. Put on the stove and cook at 10 lb pressure for about  2 hours. Let the pressure drop and the whole thing cool till you can use your hands and get the meat out of the liquid. Remove each chunk of meat from the water and separate it from the bones and put the cleaned meat in another large kettle, fat, skin, lean meat and all go in.  Proceed till you have all the meat out of the water. Strain the water into another pot to remove any tiny bones and fragments that are still in there. Set the liquid aside to use later. Now with your hands squeeze the meat up really fine till it has a rather smooth consistency. It should have some texture but not be chunky.Some people like to grind the meat, I don't like the texture of the meat ground. Once it is all squeezed up and smooth add some of the liquid back to the meat to make it the consistency of really thick soup. Now its seasoning and cooking time. Set the kettle of meat and liquid on the stove and heat to simmering. Add salt to taste, black pepper, sage till you can just barely taste it and a dash of cayenne. A couple tablespoons of brown sugar will enhance the flavor of the souse with making it sweet.  There is really no recipe for this as hogs heads vary in size and so would the amount of ingredients. You just taste as you go and season to your liking. Once you have the seasoning right to suit you toss into the simmering meat a handful of plan cornmeal. Let this cook in a bit. Add cornmeal a handful at a time till the mixture is really thick and will almost but not quite hold its shape when you stir it. I would not recommend more than maybe 2 cups of cornmeal total in a average batch of souse meat. Let the meat simmer till the cornmeal has had time to kinda cook a lil and soften. Take the kettle off the heat. At this point you can pour the meat mixture into loaf pans or any pan of your choice to chill. Once you have it in the pans, set in the fridge to chill and set. Once it has chilled you can turn out the loaves and slice cold for sandwiches, slice and dredge in flour and fry quickly in hot lard till crisp on the outside or take a slice and heat it in the microwave till hot and melty and eat with crackers kinda like potted meat. The old folks never let anything go to waste when they butchered. This is very much like scrapple that is made by the Pennsylvania Dutch.
Now for pickled pigs feet. Yes they are good and easy to make really. Procure you some pigs feet that have been cleaned. If you have done your own butchering you will need to saw off the toes. Your can also saw the feet in half to make em short enough to fit in quart jars. Then split them length wise in half. Once you have done this drop them in a kettle of water and simmer for about half an hour till almost tender. Remove from the water and rinse and pack the feet into clean quart jars. Then you make a pickling mix. For every 2 cups of white vinegar add 2 tablespoons of salt and 1 tablespoon of mixed pickling spice. This recipe can be doubled as many times as need to have enough liquid to cover all the pigs feet in the jars. Once the feet are covered with the pickling liquid put the lids on the jars and put in pressure canner. Pressure can at 10 lb pressure for 90 minutes as with any other meat. Let pressure drop on its own. Adjust time for your elevations of course. Remove from the canner and let seal. Store for at least 2 weeks before tasting. This gives them plenty of time to take the pickling mixture. So yummy. Now you can sit back and enjoy the fruits of your labor.
Till next time, blessings from the McGuire homestead.

Stella

Making sausage and rendering lard

Now you have successfully butchered a hog and hopefully have pans of odd shaped and strange looking meat to do something with. First off you need to get some of it packaged like you want for cooking. As for me, I sliced the tenderloin and froze it in layers with plastic wrap between the layers. Once frozen I put it in bags and vacuum seal it, label and back in the freezer. The ribs halves are cut in half and each rib is then cut apart. I like fried ribs or grilled ribs, so these are packaged and vacuum sealed and frozen. Now you can freeze the pork chops and chunks of back bone as you like. I froze the pork chops and trimmed all the meat off the back bone chunks for sausage. And you still have odd looking pieces of meat. So you take each piece and cut any skin and fat into about 1/2 inch cubes to render for lard. The lean and about 30% of any attached fat goes into a container for sausage along with any pieces of meat that are really fatty.  Once this task is done its time to grind sausage. I normally use a hand crank old fashioned grinder but Josh was kind enough to loan me his electric grinder which did a great job.

Once all the meat is ground up you season it. I use sage, salt, red and black pepper and a touch of brown sugar. We had about 30 lbs of meat ground, and for this I use almost a quart pickle jar of home ground sage, about 4 tablespoons of cayenne pepper, maybe a quarter cup of salt, less than a quarter cup of black pepper and about 1/3 cup brown sugar. This is ball park. Then I mix in the seasoning by hand. Keep in mind this is more a method than a recipe, so adjust seasonings to your personal taste.
This does take some time. It is also good if you can have someone help you with this as you get the seasoning mixed in they can fry a small sausage patty and you taste test it. Then add seasonings according to your own personal taste. You should be able to taste a lil sage and black pepper, you should have a slight after bite from the cayenne pepper and just know that it has brown sugar in it. The brown sugar does for sausage what salt does for any dish, it simply enhances the flavor. Now after you are done adding ingredients to the sausage and are sure it taste like you want it. Then you can put it in bags like we did or make patties and freeze them, use the way you like. If you use sausage on pizza and like Italian sausage add a hint of garlic powder to the seasoning. Now you can chill out or collapse as I did until day 2 of the lard making.


We got out the cast iron lard kettle that my dad used that his family used and prolly family before that along with the paddle used to stir the lard. I got the kettle all washed out inside and added about a pint of lard that I had here to the kettle over a fire to get it started rendering.


 This is the kettle and then I added the lard after Rodger got a fire going under it. This process is best done outside to keep the grease out of the house.


You need to start with a low fire, as to not get the kettle too hot and burn the lard or it will taste burned.  And it does need to be stirred constantly when you start to keep it from sticking also. We all took turns stirring the lard kettle.
We did this at Jason's house and his cat needed to be entertained too. So we took turns with this as we got a break from stirring.
 This is what the cracklings will look like at about the half way point of being done.


 As the cracklings get done and the lard finishes, the cracklings will float to the top of the lard. When it is done we use large hooks to pick the kettle up off the fire and set it on a flat surface that we have put a clean piece of tin down so the kettle don't become uneven and tip over.
I had a large stock pot to strain the lard into and used a cheesecloth lined strainer. The hot lard and cracklings were dipped out of the cast iron kettle and poured in the strainer to strain out the cracklings and fine pieces of meat. Set the container of lard aside, Do Not cover it, to cool. I do use a towel over the top of the kettle to keep dust and dirt out tho. Let the cast iron kettle cool, wipe down inside with a dry clean rag and store in a dry place till next time. If the kettle is like this one and well seasoned it wont need to be washed at all. Only just to get out dust and dirt prior to next use.  Put the cracklings in a separate container to be used in crackling cornbread or if you are like me to be eaten as a snack. And trust me, today I have eaten my share.
Now most likely tomorrow after the lard has cooled, I will bring it home, and remelt it and pour it into hot half gallon canning jars, and put on the lids. As the lard cools the lids will seal and it will keep for a long long time in the pantry or cellar. The cracklings I will bag up and freeze for later use.
I hope this has given someone the courage to try their hand at butchering their own hogs for meat. If I think of something that I have left out later I will go back and add it to this post but will let you know there has been additions in future post.
We had a good day but there were many times I sure missed dad. This is the first time we have butchered a hog here on the farm since dad has been gone. But I have to say, he taught me well, I did remember how to do it from beginning to end. And now hopefully Jason and Josh both know as well. Maybe I have passed on some knowledge as to how hog butchering is done the Appalachian way.
In the next post I will tell you how to make souse like I have done it and share the recipe or method. And the pickled pigs feet as well. But till next time, blessings from the McGuire homestead.

Stella

Finally I can sit down for a bit

Happy New Year to everyone, and I hope this year is full of happiness and prosperity for you all. We have had a really busy productive 2 days  here on the farm. As you know already yesterday was butchering day for Petunia. So if you are squeamish stop reading now and for pete sake done look at the pictures. But for the sake of some of my readers that are interested in butchering their own hog I will do the best I can do give you a good description of the whole process from the shot to the freezer. Our animals that are meant for slaughter are treated really well, feed good I think as God meant all animals to be treated in our care. This hog was corn fed for the past month on only new corn that we grew here on the farm without chemicals and water from the well. Organic? Maybe you could say that, but I will call it top of the line wholesome.
So on New Years eve we got this process started. Rodger, Jason, Josh and I got all our ducks in a row, got the water kettle set up and a fire built to heat scalding water. Yes we scald our hog, we do not skin them, I personally think it makes for much better cured meat. I do know it looks much better. We use the same kettle that is used for water to pluck chickens. The water should be hot enough to not let you dip you finger in the second time, almost a rolling boil to which you can add a small amount of Dawn dish detergent. The dawn helps break down any oil on the animals skin and hair to make scraping easier. Once the water is at the right temperature it time to do the deed. And yes we use a .22 rifle and always use a .22 short not a .22 long rifle. The .22 short will penetrate the skull and make a clean kill without going in far enough to damage the shoulder meat farther back.


As soon as the kill is made the animal needs to be "stuck", which means the throat needs to be cut to allow thorough bleeding. The cut should be made as soon as the animal hits the ground as it is best not to wait till the kicking stops. The placement of the cut is essential too as it needs to be made about 2 to 3 inches behind the jowls or rounded part of the jaw and near the throat. This will severe the jugular veins and get a good bleed. Then the animal is allowed to bleed out and stop the kicking or death throws as some choose to call it. After this the animal needs to be moved by what ever means you have available to the area where you are going to do the cleaning and butchering. We used a large piece of rubber roofing to drag the animal to where we could get to her with a tractor and boom pole. Then with a very sharp knife you need to make a slit in the skin on the back of the rear legs down near the foot. What you are looking for is actually the ham sting, a very tough ligament that you should pull the hooks of the gambrel underneath. We have and use a single tree that is made to use with a team of mules or horses to pull a plow. The ham stings will support the weight of the animal. A gambrel used to hang deer will work fine, just make sure to check the weight limits. At this point the hog is hoisted up with the boom on the tractor and taken to the scalding area. She was laid on 2 wooden pallets that had been covered with the piece of rubber roofing that was used to drag her to the tractor. Now the scalding and scraping began. The kettle we used is about 30 gallon, but ideally you need a 55 gallon metal drum laid on its side with a opening cut so you can dip the hot water to use. The water heats quicker and you will have more than enough to clean the animal. So we started but pouring the scalding water on the head area and then cover it with old burlap feed sacks that were dipped in the hot water. This does help keep the heat in and make cleaning easier. After the water sets for a couple minutes you can check to see if the hair will come off, just pull and if it gives loose real easy its ready. For the scraping use a preferably large long bladed knife holding it by the handle and the tip and "scrap" the hair off the animal. You do not want to "shave" the hair off, it will leave part of the hair in the meat which you dont want.  IF the water is hot enough this task should go fairly quick. The head and the feet are the hardest parts to clean and will require some soaking for a bit with the hot water and burlap treatment.You use this method to get all the hair off the animal and no matter what color hog you start out with it will end up white. This hog being somewhat small there was not enough meat on the head to warrant worrying with it and getting it really clean.But we did clean the jowl really well as it does make some of the best bacon. The same with the feet. I'm not lazy but it was gonna be far more work than it was worth. After the scraping is done this is what you will have left, one clean white pig.

This photo kinda gives you an idea of the setup. Water tank nearby, pallets below covered with rubber roofing material and one cleaned hog. After the animal is cleaned it is best to re-hang it from the tractor boom for the gutting process. It does make it easier. Now for that process I will do the best I can to give you details. The first task it to take off the head. A long bladed butcher knife is the best tool for this. You will start at the throat hopefully near the stab wound and again about 3 inches behind the rounded jowls and make a straight a cut as possible all the way thru to the spine. You will go thru the jugulars and esophagus and when you reach the spine you will need the meat saw to cut thru the bone. We have the old fashioned meat saws but Josh had brought his battery powered reciprocating saw that made quick work of cutting thru the spine. So now with the head removed it can be hung up to drain and taken care of later. To hang the head, we usually use a hay hook to hook thru the septum, which is very tough and then hang it up on the side of the meat house till we get ready to take care of it a lil later. Now on the the gutting part. Your first cuts should be made to get the rectum and genitals in our case, cause it was a female, loosened up. Use a pair of pliers or better yet vise grips to get a grip on the edge of the rectum and then with a very sharp knife cut around the rectum and genitals till they can be pulled out a lil bit and tied with string to prevent any bowl contents from contaminating the meat. Then proceed to cut around the colon as far down as you can see and then keep seeing and cut more. This is the point when you do NOT want to cut into the colon or intestines of any sort. Then you go the the front of the hog and start making your cut from one end to the other for gutting. Take a sharp knife and make a "mark" from the center of the genitals to the neck. Then start at the neck end which if it is hanging up will be the bottom and cut into the neck till you hit bone keep working the cut upward till you come to the end of the breast bone. Once you have cut thru all layers of the animal to the breast bone, you will again need a saw to cut thru the breast bone. Don't worry, the guts will not fall out. At this point they are being held in by the diaphragm. Now with the breast bone cut you will be able to see the heart, and lungs. Now go back to the top or rear of the animal and make a cut from the genital to the breast bone just thru the skin, then on the second pass down you will cut thru a thin layer of fat, now to the tricky part. Once you are thru the skin and fat you will see and feel a thin membrane. At this point this is all that is holding the guts in. Open up the membrane near the genitals and down about 8 or 10 inches. Now what you will see is the hind quarters and the atch bone that connects the hips together. This will need to be cut as close to the center as possible. I think the best tool for this is a small hatchet and a hammer. Lay the hatchet blade on the atch bone and hammer it thru till you know you are thru the bone. Be careful not to hammer too far in and puncture the colon which lies between that atch bone and the spine. Then carefully using a knife while someone else pulls upward on the tied off colon cut the colon free and once it is free pull it forward toward the animals belly. So far you should have successfully got the stinky parts free and you are for the most part out of danger of cutting a gut. Now go to the cut you made up the belly where it is still intact and put 2 fingers on the inside to hold the intestines back a lil and using a knife or knife with a gutting hook go ahead and open up the whole belly by cutting the membrane. The intestines will come out into a large container that you have hopefully placed under neath the head prior to this. Once the intestines are out and you look inside the cavity you will see that they are still being held in by something. This is the diaphragm, and this will need to be cut loose. Once the diaphragm is cut loose all the way around you can use your hands to rake the lungs and all the other internal stuff out and pull out the windpipe or esophagus. Now the animal should be clean and all done inside. Unless you puncture an intestine or something there really is no need to have to rinse the inside of the animal out. Now you have a hog ready to cut up and process. The following is the method we use. We never were big on pork chops much preferring tenderloin. or back strap. So at this point you will need a good meat saw or in our case a battery powered saw to remove the spine. Go to the inside of the animal and you can plainly see the spine. You start the cut at the top or rear end of the hog and cut from top to bottom on both sides of the spine and no more than an inch away from it. Once this has been done from top to bottom lay the spine aside. This can now be cut into chunks of back bone for cooking or sawed into small pork chops. We usually end up with some of both. The ends of the back are left in chunks for cooking like a stew and the middle section is cut into chops. Now with this done, we lay the hog skin side down on the cleaning bench that has been hosed off and is very clean.
Once the hog is lying on the bench the ribs need to be removed. You feel for the rib bones near the shoulder and with a sharp knife trim them away from the animal and you will end up with the half of a rib cage. These are cut as you like for cooking. On the back you will see a long lean strip of meat, this is half of the back strap or some call this the tenderloin. It is very easily trimmed and pulled out and with the pulling you will know when to cut it off cause you cant pull it out no more. Lay this aside to slice as desired for cooking.
Then I cut each half of the hog into 3 sections. We call this blocking it out, the hams and shoulders will look kinda square. At this point they will need to be trimmed up and shaped to look like hams. The trimmings are set aside to later separate into lard and sausage meat.The feet were removed just below the knee prior to laying the hog back down. The hams are taken to the meat house where the get the cure placed on them and laid on the bench to drain. As for trimming the bacon or middling, when you look at them you will see the pretty white area at the top where you pulled the tenderloin from, this can be taken off and cut for lard or left on and cured for "fat back". I left one on and took one off on this hog. The middling should have a nice square shape to them. Then off to the meat house to be rubbed down with the cure.


The weather was perfect for butchering. Although when ya are working ya can get a little hot if you over dress like I did. Anyway, at this point you should have the hams, middling and shoulders trimmed and have the cure on them. Now you can take the jowl off the hogs head that you hung up to drain earlier. We normally hang the head by the snout which makes it easier to take the jowl off. Make a cut with a sharp knife from the corner of the mouth on each side to the neck area passing just below the ear where you have cut off the head. Now cut in deep till you hit bone and trim the jowl off the hog head trimming all the way to the bone from one side to the other. What you should end up with is a piece of meat that is kinda triangle shaped and is thin near the lower lip and thick near the neck area. This is rubbed down with the cure as well. I personally think this jowl bacon has the best flavor of any bacon. Now if you like liver you go back to the tub containing the intestines and retrieve the liver and heart, and what ever other parts you prefer out of there and then dispose of the intestines. We use em for coyote bait. We don't eat liver here or the heart so it was put in the scalding kettle with a lil water and cooked along with the lungs for Luna. I did not get to make pickled pigs feet as we didn't get the feet cleaned well enough. We actually didn't have enough scalding water.And in the middle of scraping a hog you don't want to let it lay and wait for water to heat. And with the hog being small it was not worth the work to make souse meat either, just not enough meat on the head. So I didn't get to do either of those. I was so looking forward to some souse meat too dang it. But in a later post I will tell you how and give you the recipe for souse meat that I use as well as the one for pickled pigs feet.
Now with all the outside work done you are ready to take the meat that has been trimmed off and separate the lard from the sausage meat and make your sausage and cut the lard for rendering. As this has been a rather long post I will do the next post on sausage making and rendering lard.


Stella